Carburetor SU HS6 Set up for Land rover series Part 1.

In search for the best replacement of original Zenith carb, I found few alternatives, again Internet is helping me a lot. In the spirit of sharing, I would like to share my carburetor set up. I have written: possibly the best carburetor for land rover series few days ago, so I will not cover why I choose SU (skinner union) carb. Here I will explain about the set up, lets start…

Installation is the most complicated one

  1. It requires you to fabricate the manifold / bracket to attach SU carb to your inlet manifold
  2. It needs us to alter the current linkage (to pedal) set up
  3. SU HS6 comes with many type: Left fuel bowl, right fuel bowl, 90* (up right position) and 30* (slightly tilted like in V8 rover)

Those three combination of complexity need us to think, the best placement for the carb. Is it facing to engine, is facing the bulk head or is it facing the radiator fan etc.. Undeterred by this complexity, I go ahead and by second hand SU HS6 and hell broke loose.. :)

Installation: The relatively easy part is buying… I am lucky to get New Old Stock SU HS6 quite cheaply,  so that is good..

SU-HS6
SU-HS6

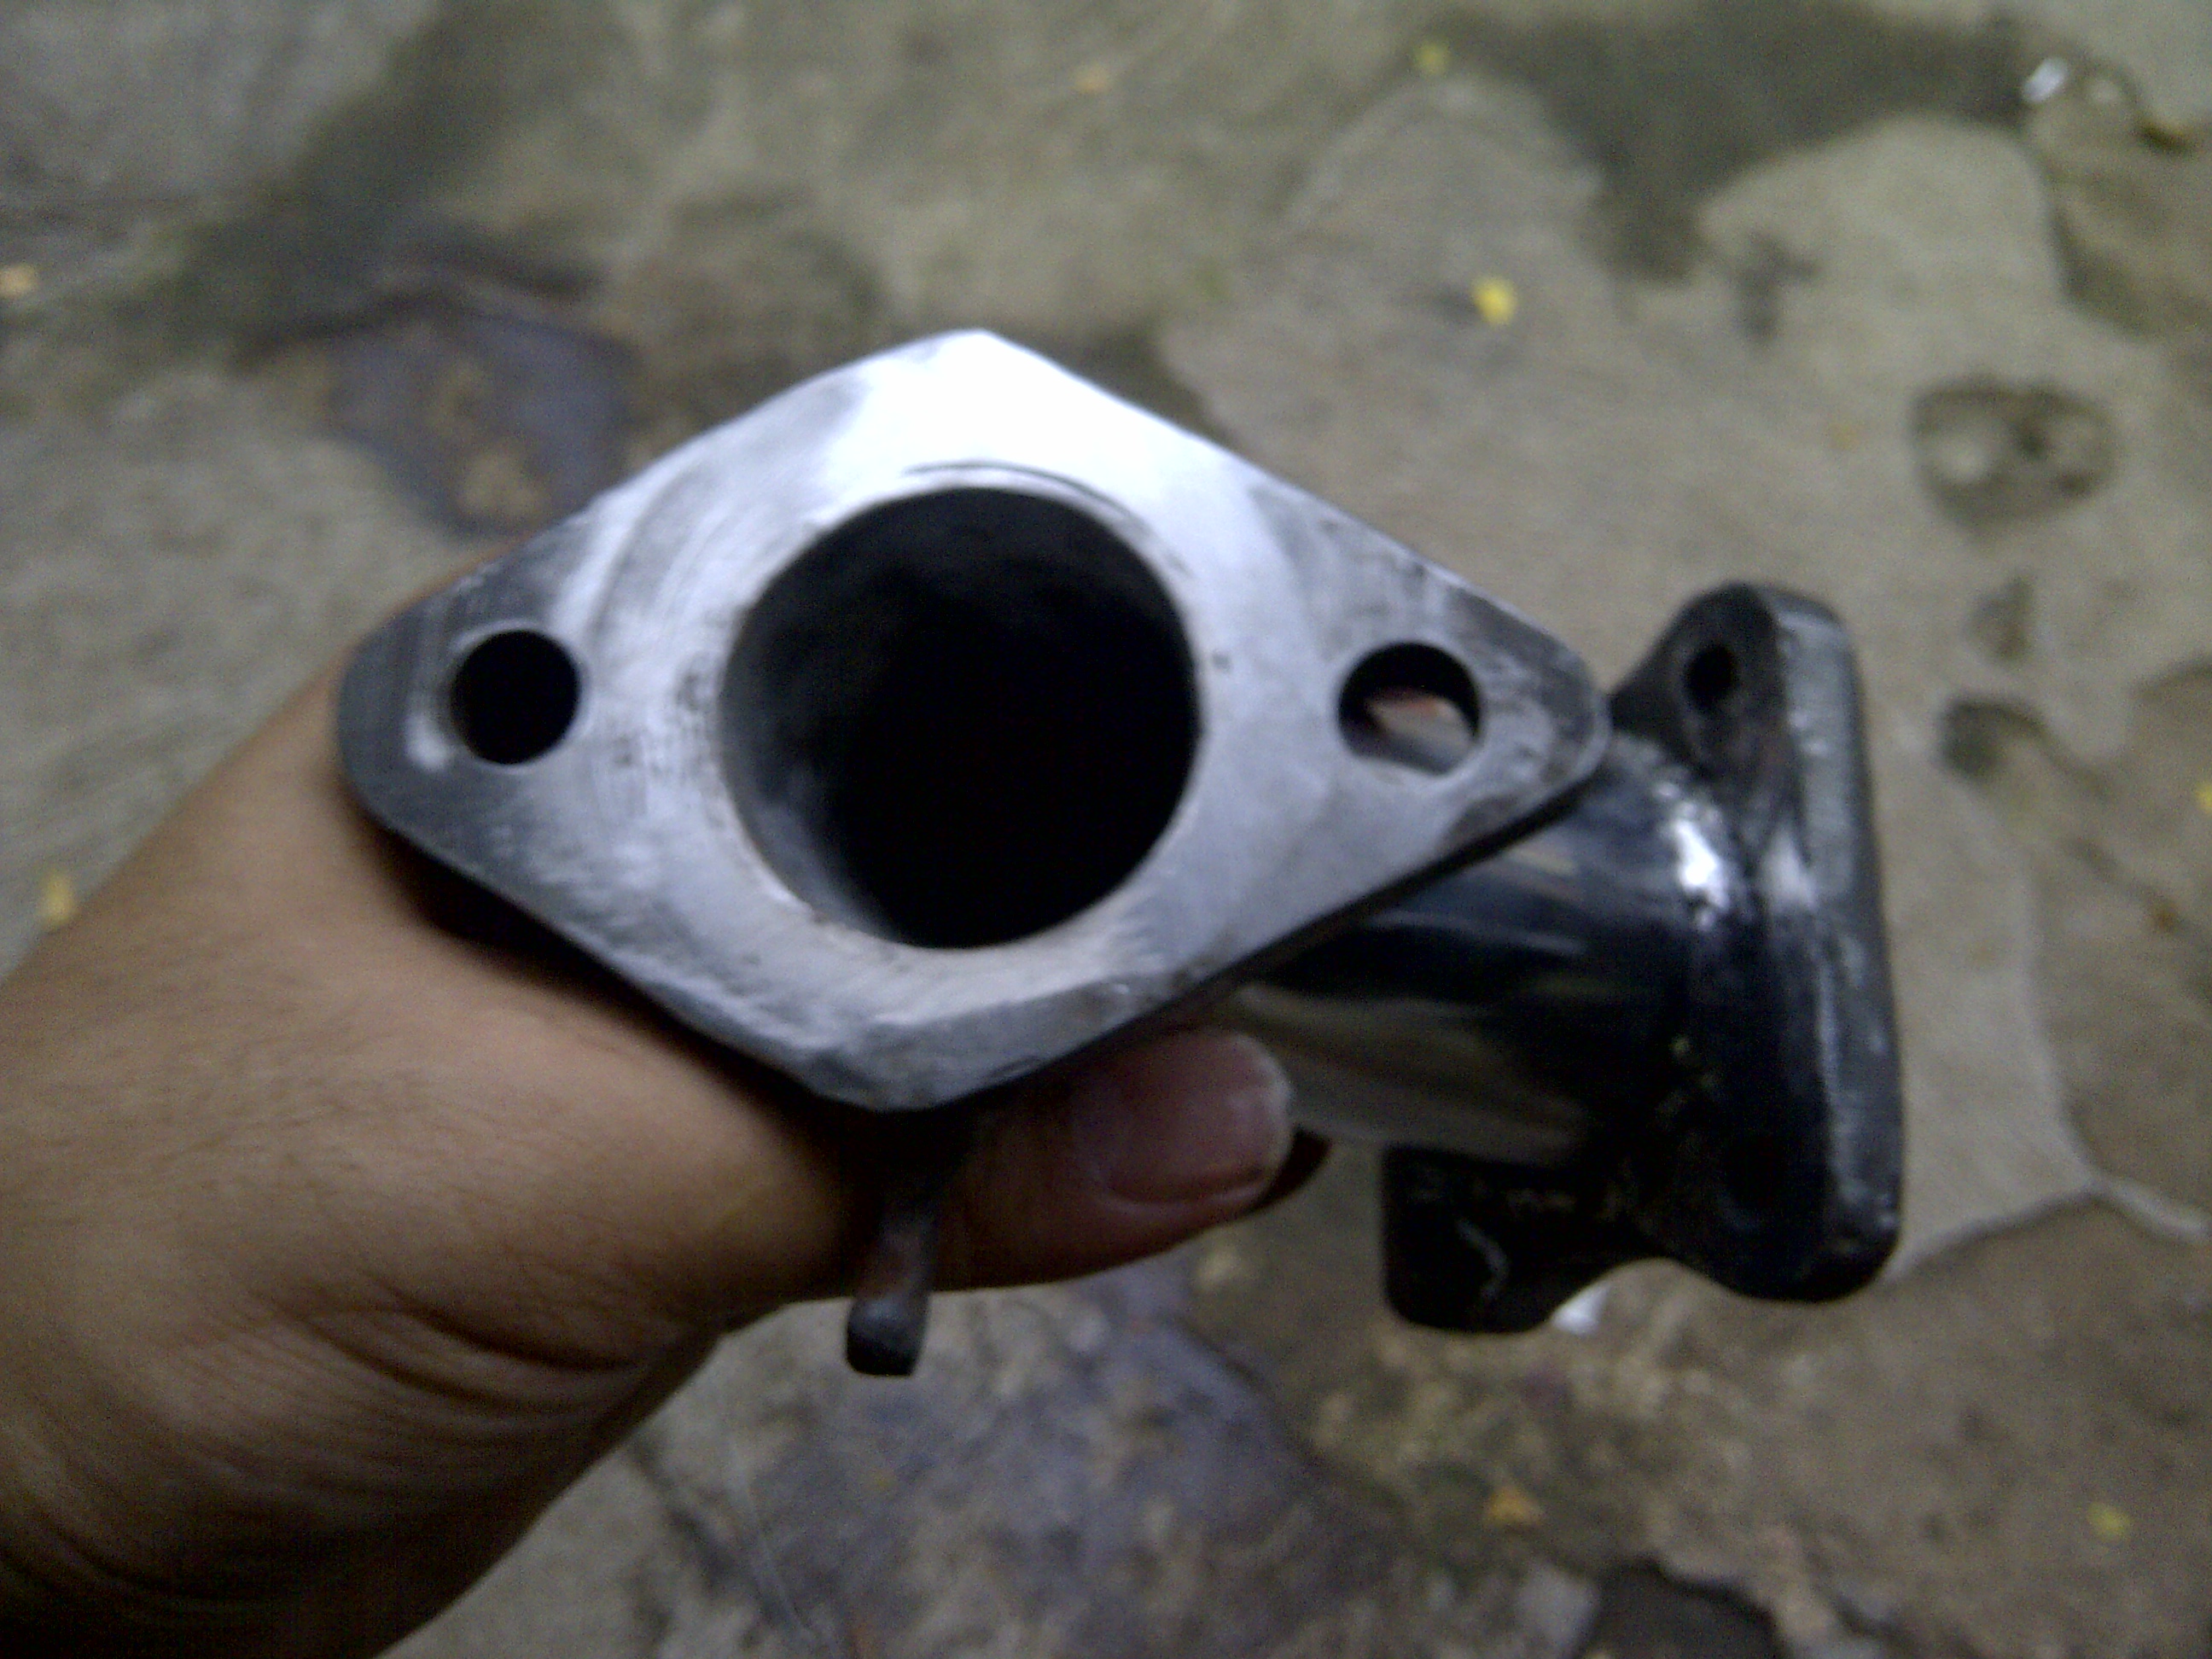
Now lets make the manifold / bracket or anything you called to attach the carb to inlet manifold. The easiest way is go to a garage that have access on lathe and ask them to set it up for you. for my case I have to go to two different special garage, one is to make the base (two bases as you can see here: one goes to carb and one goes to manifold) the the other garage (exhaust specialist) to make the connection pipe and set it up in the landy. Here is the manifold ready to be installed.

IMG-20130407-00794

And finally here is the installed carb… Picture explain better than word.. :)

SU HS6 set up

With this set up I still retain part on the throttle linkage, just in case if I want to change it to zenith again, I still have the parts in there… Hence it installed away from bulkhead and closer to radiator fan. The oil bath filter is still there, although currently it is redundant… but yes you can use the oil bath filter again if you will cross Sahara desert… :)

So that’s all folks… if you have question please ask down below… stay tuned for part two I will talk about setting up the needle, jetting and spring and how it different with Zenith… see you later..

Possibly the best Carburetor for Land Rover Series

The original carburetor is Zenith, and from what I read is the best suited for land rover series. But the Zenith now is on the phase of extinction, the old one is mostly beyond repair, and it will be lucky if you can get new one at decent price. I am trying to order new Zenith from the manufacturer and they said that they produce no more…

So what is the 2nd best option for our pet..? Landy lovers around the world have tried many things with various success, the following brands are frequently mentioned as the best replacement for Zenith and Solex, not in particular order:

  • Rochester BV : for those who live in US seems prefer this option.. you can read it here: http://www.expeditionlandrover.info/landRoverFAQ/FAQ_rochester.htm  from Terry Ann Wakeman one of the land rover guru.
  • Weber : There are few types of Webers: usually 34ICH and 3236 again you can read it here: http://www.expeditionlandrover.info/LRpartNumbers.htm#carbs from terry wakeman site.
  • Skinner Union (SU): The other side of continent, Europe, they seems prefer this option (using SU HS6), a lot of Land rover forum is talking about this type of Carb to replace Zenith or Solex
  • Various Japanesse carbs : I’ve seen few landy  in Indonesia use japaness carbs and it si going OK..

All in all, I think land rover will take any Carb for its heart transplant, but the question is… what is the best carburetor for her.

I have no means of testing each of the brand, but what I can do is searching online, and  read comments about it and asking around in few forums. Now I will give few rating on each of the brand with few attributes (NOTE: this is personal opinion based on reading some online articles or user comments in forums)

Rochester BV Weber 34ICH SU HS6
Availability Difficult Very easy Easy
Easier to install Easy Very easy Difficult
Easier to set up Easy Difficult Very easy
Fuel Economy Good good Very Good
Reliability Very Reliable Reliable Very Reliable

So which one is the best for our landy…

Weber 34ICH, is a good all round carburetor, its plenty and easily available, easy to install etc. But it is more  more susceptible to dirt and water in the fuel and can frequently cause problems if the fuel is not clean and well filtered. Not easy to set up and a bit more sensitive to altitude change.

Rochester BV will be more reliable and easier to set up than Weber, but availability is difficult to obtain and expensive… I was quoted US$ 300 for NOS Rochester BV and the second hand is also quite expensive.

SU HS6, it is very reliable and very simple design, less moving parts hence the reliability. Availability is equal if not better than Rochester BV. Used in many British cars hence second hand are plenty and easier to get… the tricky part is, we need to make some kind of adapter to fit in landy series.

Simple test on the availability, go to ebay and type each type of the carburetor and which one is more readily available.

All in all, if I have access to those threebrands easily, I will say that my choice for the best carburetor for land rover series is SU HS6… I know I simplify a lot of things but that is my conclusion, if you have other opinion.. please write down below.

SU HS^
Second hand well used SU HS6

Will post the set up later

Cheers

Electronic ignition for land rover series

Another little weekend project…  this time,  installing Electronic Ignition distributor to replace point breaker (we Indonesian call it “Platina” ) distributor which already 30 years old … I have few problem with current stock distributor is:  the vacuum is not working properly (blocked) and also the wires, contact point seems no longer in top shape, might as well replace with the electronic one. For those who want to read a longer explanation on ignition system, you can read it here : http://www.jetav8r.com/Vision/Ignition/CDI.html

You may ask why do we want electronic distributor..? Well, many reasons actually… some of them are the following:

  1. Less moving  part hence minimal wear and tear hence better performance especially in high mileage car where wear tear affect timing and loss performance
  2. In point distributor, sparking at the points burns the contacts and wastes energy, Electronic ignition systems allow most of the available energy to reach the spark plug and improve combustion
  3. Better starting and smoother running
  4. No need to check or adjust and clean contact breakers
  5. No capacitor to fail or go weak
  6. More water resistant

Having said that… the perfectly set up (if both new) electronic and breaker point distribution show no significant difference in terms of performance. The disadvantage however, unlike point distributor, if it is fail, you can not fix it, have to replace the unit. Just for peace of mind, you can bring the electronic  “gut” for spare that will solve the only disadvantage of electronic distributor.

here is the picture of typical point distributor:

point distributor
picture taken from : http://retrorides.proboards.com/index.cgi?action=display&board=readersrides&thread=72501&page=23

This is the electronic distributor

image taken from : http://retrorides.proboards.com/index.cgi?action=display&board=readersrides&thread=72501&page=23

The following video showing the conversion from point distributor to electronic (5 minutes video).

Do I see or feel any improvement using this set up..? I will say yes.. :)

Which spark plug for land rover series

Go to : http://www.richer-engineering.com/Series/spark_plugs.php for more lengthy explanation

In a nut shell:

For the land Rover 2.25, the required spark plug is:

14 MM plug thread
3/4″ reach (length of the threaded portion of the plug)
Gasketed seat
13/16″ hex
Resistor (optional – see above)
Copper core
Medium heat range (range from hot to cold)

In looking at this I hear you ask, “What about platinum plugs? Iridium? Multiple electrode?”

In short, don’t bother. Not worth the effort for an engine as lightly stressed as the old 2.25. Personally, I don’t even like them in my Rover V8s. If the engine isn’t designed to use them it’s not worth the effort.

For the Rover 2.25:

Champion RN11YC4
AC Delco R44XL
Autolite 64
NGK BPR5ES
NipponDenso W16EPR-U
Bosch WR8DS

Me: I am using Bosch platinum+4,  works ok…. One more thing, while you are at it… checking the condition of spark pug may be a good indication how healthy is your engine and electrical system in general

check_spark_plug_condition

Killing few bugs in one strike – land rover series III – Starter motor upgrade

Few days ago I have to manually crank the engine of land rover series III, due to malfunction of the starter system… as I said earlier there are a lot things can go wrong, it is expected from vehicle with more than 30 years old. So I need to investigate few things:

  1. Key ignition works OK,
  2. Starter motor, So and So but it works
  3. Battery need to replace with newer one (but still have some power to crank the engine)
  4. Starter solenoid is not good
  5. Cables and negative ground is loose and rusted in few places

Few things failed at the same time will be very difficult to fix in short time or on the road, just to give illustration how the starter system in land rover

starter

Actually it is very straight forward… but it need big cables everywhere, because the current is quite big, cables from battery to soleniod to starter (big red cables) has to be able to handle 250 amps… . Can you imagine if the contact is loose, the cable will not deliver enough current to turn the starter motor, and the cables become hot (in fact I saw the rubber/ insulation get burned) especially near contact point.

This set up is using old technology, now I want to upgrade it to newer technology where the it will more efficient, simpler, less wear and tear and easier to maintain…. this following video is explaining what is the advantage and dis advantage of the three starter motor types… (6 minutes video), which I strongly sagest you to watch it before continue reading this article…

Of course I want the latest technology hence I opt for Hi Torque gear reduction type… and here is the set up:

hitorque starter  From the above diagram, seems that  it involved more cables than the original set up, however there are few benefits using this set up:

  1. The current to ignition key is much  smaller only 0.5 amps hence less likely to burn the cable inside the cabin (saver)
  2. There are additional relay which will handle higher current (30 amps instead of 250 amps), if the relay fail, it is very easy to replace. only less than 1 minute job (easier to maintain)
  3. Solenoid is still there but become one with the starter motor (simpler)
  4. If you watch the video, you will understand that the new starter motor will draw less amps and because it “pre engage” it will less likely damaging the flywheel
  5. I am also change the old cables on the ignition system with bigger and better cables

The actual comparing side to side with the old starter motor as as below

IMG-20130403-00781

So… that is the upgrade, and  I am pretty please with it… Now starting the engine is very pleasant is much smoother and easier… it works first time, any time and every time . Gives me smile when I turn the engine on. I may be will not need the manual crank handle anytime soon, but I keep it ready in its place just in case…

Is it the end of the story..? NO.. far from it, one thing that I remember from the school back then is… we need to know what is the route cause… and certainly this upgrade is not addressing the route cause on why the Landy suddenly stop in the middle of the road… without addressing the real problem, this upgrade will become useless.

So stay tune.. more on this later

Cost of upgrade : US$ 350

Failed to start land rover series… what to do..?

Happened to me…  I was cruising on a road with not so heavy traffic and  Landy suddenly stops…  “No problem… I can just re-start the engine” I said… but alas… this time landy refused to start the engine…trying many time turning the ignition key, but I can only heard… “nguk..” long pause… and that’s it…

There are a lot of things can go wrong…

  • The ignition key may be faulty
  • The battery may be flat, not enough juice to turn the engine
  • The solenoid may be died
  • The starter dynamo is not working properly
  • The negative ground is not good

Lot of things to check, but so little time… Fortunately the land rover engineer is so thoughtful, they know it going to happen sooner or later to series owner, hence they provide us with a tool for hand cranking. Here is how it looks like

handcrank land rover
Pict from: http://www.aulro.com/afvb/101-forward-controls-variations/83268-starter-hand-cranking-2.html

Then off I go to start hand cranking… many of the car are slowing down  (some actually stop)  just want to know if I will be able to hand crank it… and yes… I can hand crank it on the first try… and the show is over… :)

Hand cranking land rover series is actually relatively easy, we do not need to turn the handle 360 degree… 45 degree is enough… here is examples  on how to manually crank land rover series : the dangerous way, wrong way and the correct way…

The dangerous way but works

It dangerous because, if the engine kicks back, he will break few bones… it called  hand crank BTW …. but it works nonetheles, only for a seasoned land rover users

The wrong way

no need to turn it 360 deg all the way… you need 360 deg rotation to prime the carb with the ignition off. and then around 90 deg for the actual crank…

Here is the correct one

just to recap, if you have to manually crank it from the cold engine:

  1. Disengage the gear
  2. Turn off the ignition key
  3. Choke the carburetor
  4. Turn the engine using hand crank few times to prime carburetor
  5. Turn the ignition key on
  6. Place the hand crank at 10 – 12 o’clock position if you are left handed or 5-6 o’clock position if you are right handed (slightly before 12 or 6 is perfect)
  7. Hold the crack handle by “cupping” it with your finger (olace your thumb above the handle with the rest of your finger)
  8. Pull the handle as fast as you can to 2 o’clock position if you left handed or to 7 o’clock position if you right handed
  9. hope that you are lucky if not start from number 2 again.. :)

If your engine is warm just start from number 6 (do not forget to disengage the gear first… one thing that you need to remember: ONLY PULL the hand crank NEVER PUSH..!
thats it for now… please excuse me, I have another landy bug to kill… more on this later